We’ve looked at how Data containers add flexibility to System Protection backups, by providing restore points from incremental backups and making the backups more portable. Now we would like to tell you about another advantage – ease of use.
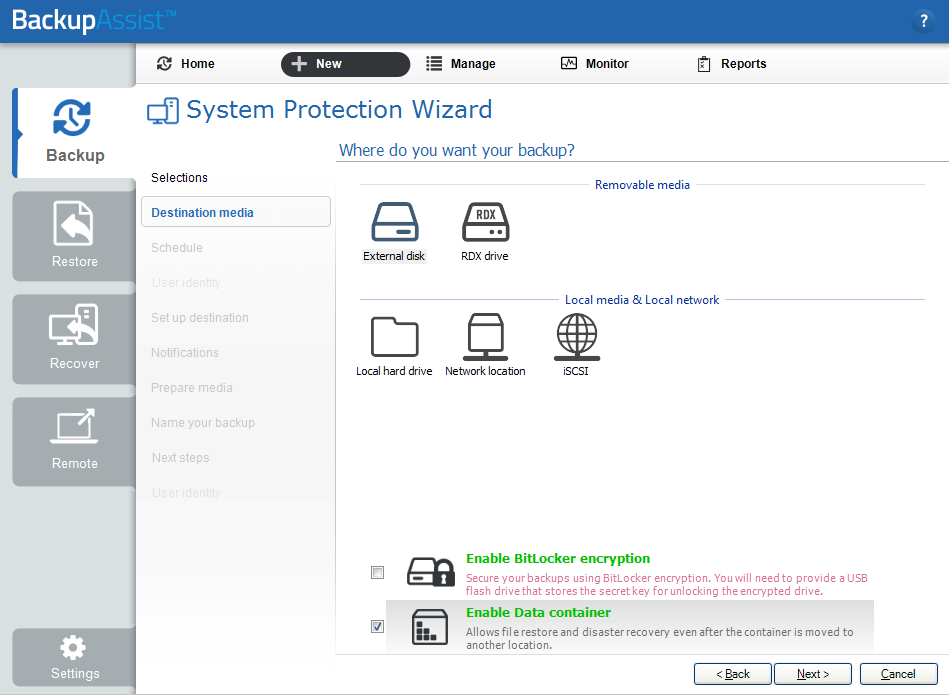
Creating a System Protection backup job is already easy using BackupAssist’s wizard. Each step guides you through the process, and two of those steps are used to create a Data container. All you do is enable the container in the Destination media step and configure it in the Set up destination step.
Destination media
This part is simple. You put a tick in the Enable Data container box.

Set up destination
All you do in this step is say where you want the Data container to go and how big you want it to be.
- Selecting where you want the container to go is easy – just enter the path into the field provided. The Data container will be automatically created at that location the first time the backup job runs.
- Set the size of the Data container using the Container size up and down arrows – or – select Use all available space and all available space on the destination device will be used, up to 2TB.
By default, RDX and External disk destinations will have Use all available space selected.
That’s all you have to do to create a Data container. BackupAssist will automatically mount the Data container each time the backup job runs and put the backups inside it.
Want to do a restore?
Easy – the Data container is mounted automatically. Nothing changes for you.
Need to perform a recovery?
No problem. During the backup selection step, RecoverAssist has a button called Search for Backup in a Container. Click the button, browse to the location of the Data container and RecoverAssist will mount it for you. Nothing else changes.
It would be great to go on and explain more about setting up and configuring a Data container, but this is all you have to do. You tick the box, enter the location and set the size, and the BackupAssist Data container is good to go.
